Nazir Doğan Code Blog

Facebook Flow - Javascript Için Statik Tip Denetleyicisi (Static Type Checker)

| Comments

flowtype

  Flow, Facebook tarafından geliştirilen Javascript için statik tip denetleyicisidir. Bu araçın ortaya çıkmasında altında yatan neden ise Javascript'in dinamik tipe sahip bir olmasıdır. Dinamik tipli dillerde değişkenlerin tipi (string ,float, double) derleme anında bilinmezler. Statik tipli diller (Java ,C ve C++ vb.. ) ise kullanıcının değişkenlerin tiplerini her zaman tanımlmasını ister.

  Aslında bu Javascript'e esneklik getirdiği gibi bazı sorunları da beraberinde getirmektedir. Bugları bulmak,kod sürekliliğini sağlamak oldukça zorlaşmaktadır. Bunun için geliştirilmekte olan Facebook'un Flow aracını nasıl kullanacağımıza bir göz atalım.

Flow'un kurulumu

Öncelikle bir npm projesi oluşturuyoruz.

1
2
3
$> mkdir -p get_started
$> cd get_started
$> echo '{"name": "get_started", "scripts": {"flow": "flow; test $? -eq 0 -o $? -eq 2"}}' > package.json

Daha sonra Flow'u projemize ekliyoruz.

1
2
$> touch .flowconfig
$> npm install --save-dev flow-bin

Şimdi ise kodumuzu yazalım.

index.js

1
2
3
// @flow
var str = 'hello world!';
console.log(str);

Daha sonra ise Flow'u çalıştıralım.

1
2
3
4
5
6
$> npm run-script flow

> test@ flow /get_started
> flow

No errors!

Evet hiçbir hata almadık. Şimdi ise kodumuzu biraz değiştirelim. ve hata alalım.

index.js

1
2
3
// @flow
var str: number = 'hello world!';
console.log(str);
1
2
3
4
5
6
7
8
9
10
11
12
13
$> npm run-script flow

> test@ flow /get_started
> flow 2> /dev/null

index.js:3
  3: let str: number = 'hello world!';
                       ^^^^^^^^^^^^^^ string. This type is incompatible with
  3: let str: number = 'hello world!';
              ^^^^^^ number


Found 1 error

Şimdi ise hata aldık. Çünkü number olarak belirlediğimiz değişkene string atadık.

Bir örnek daha yapalım.

1
2
3
4
5
6
function foo(x) {
  return x*x;
}
foo(4);

foo("Hello World");

Burda ise nerde hata alacağımızı tahmin edebiliyor musunuz ?

1
2
3
4
5
6
7
8
9
10
11
12
13
14
15
16
17
18
app.js:8
  8: foo("Hello World");
     ^^^^^^^^^^^^^^^^^^ function call
  4:   return x*x;
              ^ string. This type is incompatible with
  4:   return x*x;
              ^^^ number

app.js:8
  8: foo("Hello World");
     ^^^^^^^^^^^^^^^^^^ function call
  4:   return x*x;
                ^ string. This type is incompatible with
  4:   return x*x;
              ^^^ number


Found 2 errors

 foo() fonksiyonu number tipinde parametre alırken . Biz ise foo('Hello World') ile string bir parametre gönderdik ve hatayı aldık.

Flow için söylenecek çok şey olsada şimdilik bu kadar. Flow'u projenize ekleyerek özelliklerinden faydalanabilirsiniz. Vakit bulabilirsem Grunt , Gulp gibi görev çalıştırıcılarında ve Atom ve Webstorm gibi editorlerle nasıl kullanılacağından bahsedeceğim.

Flow hakkında daha çok bilgi için: flowtype.org

Analytics

Passing Data Parent to Child Controller - Titanium Alloy

| Comments

In this post , I will give small snippet about passing data parent to child controller.

1
2
3
4
5
6
7
8
9
//index.js

function goDetail(e){

$.tab.open(Alloy.createController('detail',{data:e.row.title}).getView());
}
$.index.open();


1
2
3
4
5
6
7
8
9
10
11
12
13
14
15
16
17
//index.xml
<Alloy>
    <TabGroup>
         <Tab id="tab">
       <Window onClick="goDetail" id="win" backgroundColor="white" navBarHidden="true" tabBarHidden="true">
        <TableView id="table">
                <TableViewRow title="Apple"/>
                <TableViewRow title="Bananas"/><br>
<TableViewRow title="Carrots"/>
                <TableViewRow title="Potatoes"/>
                 <TableViewRow title="Cod"/>
                <TableViewRow title="Haddock"/><br>
</TableView>
    </Window>
    </Tab>
    </TabGroup>
</Alloy>
1
2
3
4
5
6
7
8
9
10
11
// detail.js
var args = arguments[0] || {};
 Ti.API.info(args.data);
  $.title.text=args.data;

//detail.xml
<Alloy>
    <Window class="container" backgroundColor="white">
     <Label top=30 id="title"><Label>
    </Window>
</Alloy>

Hello World Application Cocos2d-js V3

| Comments

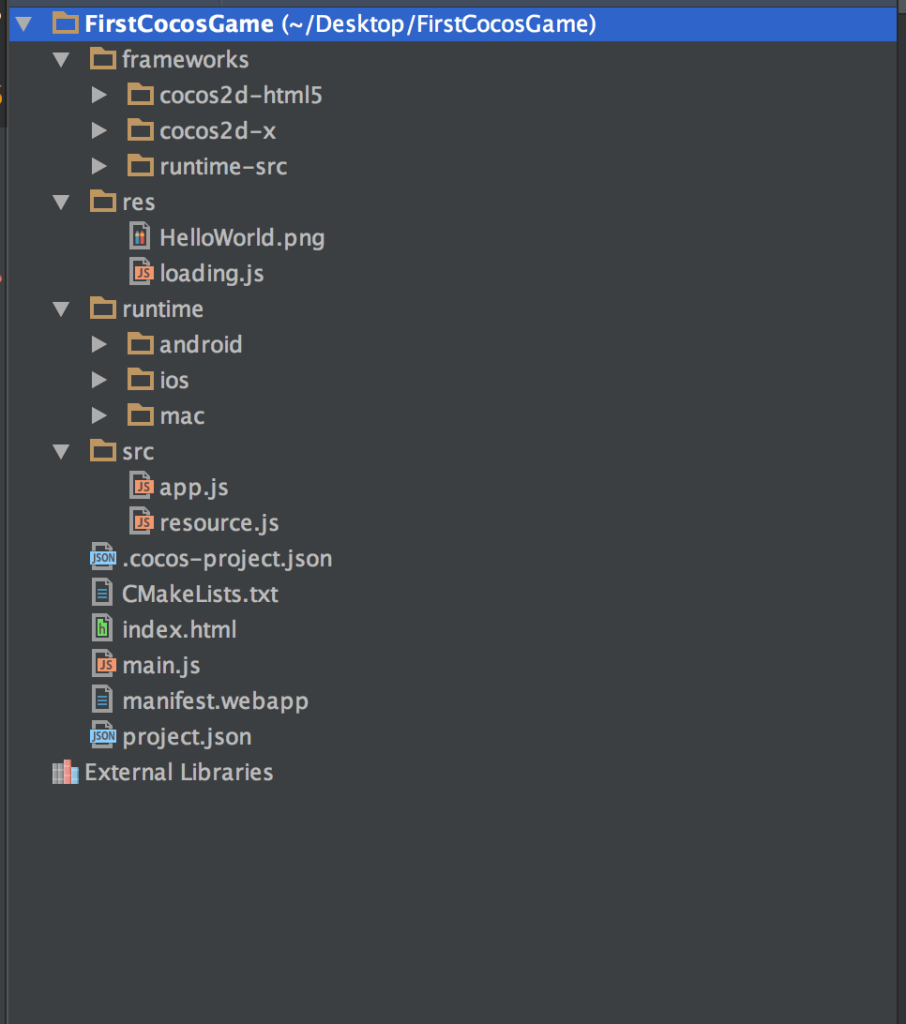
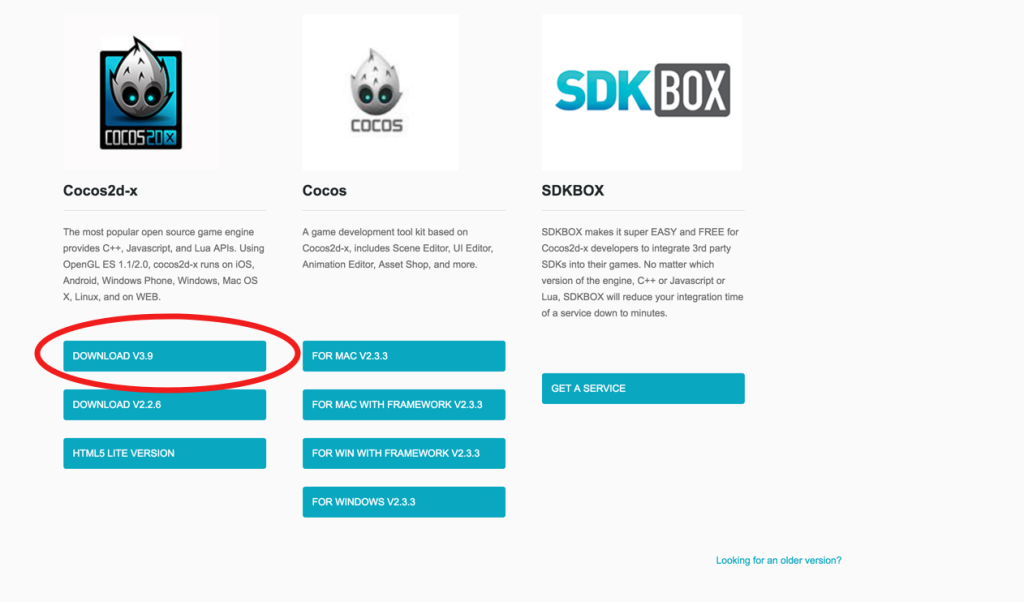
In this post , we can start a real cross platform cocos2d-js example. Let's begin (If you don't read posts about setup and what is cocos2d-js you can click to check  underlined blog posts.) If you created a project you should see index.html page . There is no interesting things in here it's just plain   HTML. 


<!DOCTYPE html>
<html>
<head>
    <meta charset="utf-8">
    <title>Cocos2d-html5 Hello World test</title>
    <link rel="icon" type="image/GIF" href="res/favicon.ico"/>
    <meta name="viewport" content="width=480, initial-scale=1">
    <meta name="apple-mobile-web-app-capable" content="yes"/>
    <meta name="full-screen" content="yes"/>
    <meta name="screen-orientation" content="portrait"/>
    <meta name="x5-fullscreen" content="true"/>
    <meta name="360-fullscreen" content="true"/>
    <style>
        body, canvas, div {
            -moz-user-select: none;
            -webkit-user-select: none;
            -ms-user-select: none;
            -khtml-user-select: none;
            -webkit-tap-highlight-color: rgba(0, 0, 0, 0);
        }
    </style>
</head>
<body style="padding:0; margin: 0; background: #000;">
<script src="res/loading.js"></script>
<canvas id="gameCanvas" width="480" height="720"></canvas>
<script src="frameworks/cocos2d-html5/CCBoot.js"></script>
<script cocos src="main.js"></script>
</body>
</html>

This canvas  will show  the game inside it.

<canvas id="gameCanvas" width="480" height="720"></canvas>

and second important thing is  its used for starting Cocos2d-js framework.

<script src="frameworks/cocos2d-html5/CCBoot.js"></script>

and last one is our actual game will start in this script file.

Lets look at main.js file. if you  look carefully we only call main.js file in index.html. Game starting at this script file even so its more like a configuration file you won't code at this moment.

cc.game.onStart = function(){
    if(!cc.sys.isNative && document.getElementById("cocosLoading")) //If referenced loading.js, please remove it
        document.body.removeChild(document.getElementById("cocosLoading"));

    // Pass true to enable retina display, on Android disabled by default to improve performance
    cc.view.enableRetina(cc.sys.os === cc.sys.OS_IOS ? true : false);

    // Adjust viewport meta
    cc.view.adjustViewPort(true);
    // Setup the resolution policy and design resolution size
    cc.view.setDesignResolutionSize(cc.winSize.height, cc.winSize.width, cc.ResolutionPolicy.SHOW_ALL);
    // Instead of set design resolution, you can also set the real pixel resolution size
    // Uncomment the following line and delete the previous line.
    // cc.view.setRealPixelResolution(960, 640, cc.ResolutionPolicy.SHOW_ALL);
    // The game will be resized when browser size change
    cc.view.resizeWithBrowserSize(true);
    //load resources
    cc.LoaderScene.preload(g_resources, function () {
        cc.director.runScene(new HelloWorldScene());
    }, this);
};
cc.game.run();

I think most important thing in here , loading resources and running scene by  the director. the others is easy to understand and just configs.

Docs says "cc.LoaderScene is a scene that you can load it when you loading files "

 cc.LoaderScene.preload(g_resources, function () {
        cc.director.runScene(new HelloWorldScene());
    }, this);

We  loaded resources file and   run the scene.

Let's look at  resources.js in our project. resources.js is file our resources described in here.  if you look at the  above code g_resources loaded. it's come from this file.

var res = {
    HelloWorld_png : "res/HelloWorld.png",

};


var g_resources = [];
for (var i in res) {
    g_resources.push(res[i]);
}

We showed path of image files. and pushed it  to  g_resources  array.  You can add more resources in here.

After looking at resources file, Let's look most important file of our simple project. its named app.js. When you start to game user will show UI in it.

var HelloWorldLayer = cc.Layer.extend({
    sprite:null,
    ctor:function () {
        //////////////////////////////
        // 1. super init first
        this._super();


        /////////////////////////////
        // 2. add a menu item with "X" image, which is clicked to quit the program
        //    you may modify it.
        // ask the window size
        var size = cc.winSize;

        /////////////////////////////
        // 3. add your codes below...
        // add a label shows "Hello World"
        // create and initialize a label
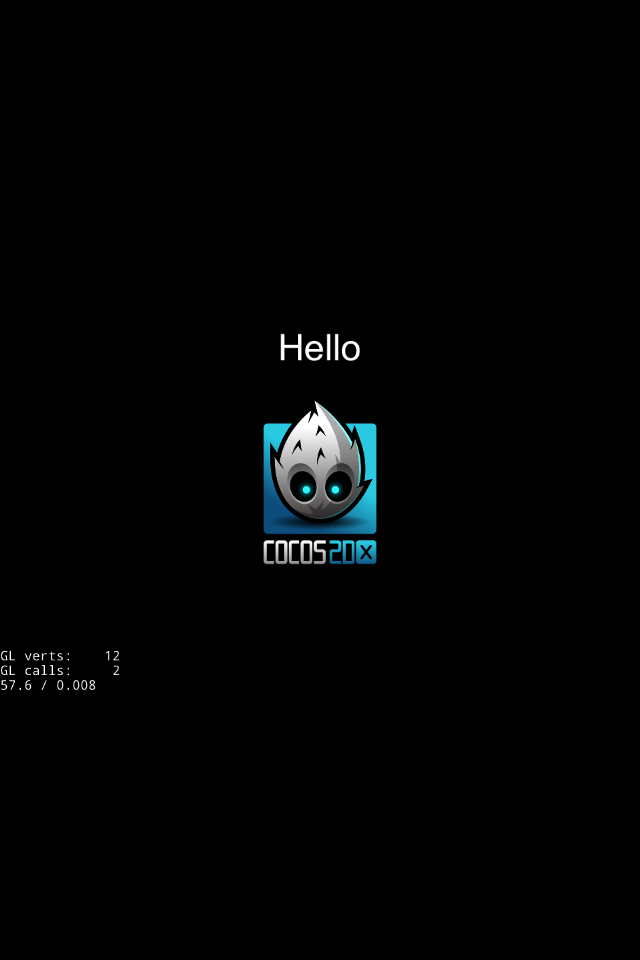
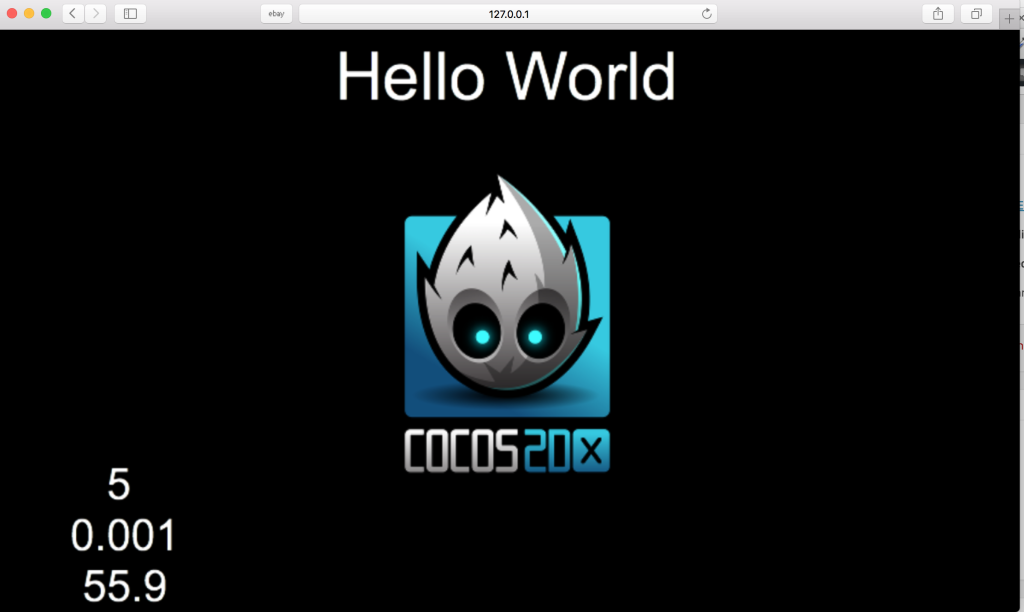
        var helloLabel = new cc.LabelTTF("Hello", "Arial", 55);
      //  helloLabel.setColor(new cc.Color(255,222,22));
        // position the label on the center of the screen
        helloLabel.x = size.width / 2;
        helloLabel.y = size.height / 2 + 200;
        // add the label as a child to this layer
        this.addChild(helloLabel, 5);

        // add "HelloWorld" splash screen"
        this.sprite = new cc.Sprite(res.HelloWorld_png);
        this.sprite.attr({
            x: size.width / 2,
            y: size.height / 2
        });
        this.addChild(this.sprite, 0);  
        return true;
    }
});

var HelloWorldScene = cc.Scene.extend({
    onEnter:function () {
        this._super();
        var layer = new HelloWorldLayer();
        this.addChild(layer);
    }
});

First of all We created  a layer and extend it. add a  label and a sprite to our layer. İf you think like director  they are our decor. After that We created Scene then add this decor to the scene. and Last we say "Action !!" .

I will not explain the code .because its very simple .If you know Javascript you will understand what is going on.

Simulator Screen Shot 15 Dec 2015 01.29.25


The Structure of Cocos2d-JS Project

| Comments

Cocos2d-js project structure is really simple to understand. so let's look at screenshoot of a folder with a Cocos2d-js project.

Screen Shot 2015-12-15 at 21.39.17

  •  The frameworks  directory, its contains Cocos2d-html5 engine and the Cocos2d-x JavaScript Bindings and Runtime including iOS/MacOSX/Android/Linux/Windows platforms.
  • The res  directory, resources folder of the project must save all images, audio, fonts, animations, etc.
  • The runtime directory , its including all executables package under development.
  • The src directory ,  The most important directory is src directory .Because your game business logic in written in there.
  • index.html   The main web page of project.  You can access when you start web server .
  • main.js  is the starter script  of project.contains initialization code
  • project.json   Project configuration file, detailed information can be found in here.

Running Cocos2d-js Project on Android and iOS

| Comments

If you created Cocos2d-js native project.(if you dont create yet .pleas follow this link) You can run on Android and OS devices or simulators. Running project so easy

-


cd directory/to/projectName
// its for compiling apps
cocos compile -p ios|mac|android|web
// its for running apps
cocos run -p ios|mac|android


-


Simulator Screen Shot 15 Dec 2015 01.29.25

if you get error like  "Can't find iOS target" or "Can't find Mac target" .You can run with code shown  below  for  iOS platform . For this example FirstCocosGame is project name. You must change with your own.

 cocos run  --platform ios  -t FirstCocosGame-mobile

for Mac platform

cocos compile --platform mac -t FirstCocosGame-desktop

Creating a New Cocos2d-js Project

| Comments

If you installed Cocos2d-js successfully. Now you can create a new project for developing Cocos2d-js game. if you dont install Cocos2d-js yet. Please follow this link.

I assume you installed  Cocos2d-js . and Now open your terminal and go Cocos2d-x directory

// Create a project containing Cocos2d-x JSB and Cocos2d-html5:
cocos new -l js

// Create a project only containing Cocos2d-html5:
cocos new -l js --no-native

// Create a project with a specified name in a specified directory:
cocos new projectName -l js -d ./Projects

Now you created Cocos2d-js project. Let's look how to run this project on Web Browser. When you prompt code below .it will start a web server and you can see game on  browser.

cd ~/Desktop/projectName
cocos run -p web


Screen Shot 2015-12-12 at 17.00.51


We successfully run our project on web browser.  Thats it :)


How to Install Cocos2d-js on Mac

| Comments

In this post , I will give information about  how to setup Cocos2d-js development environment.

First of all visit : http://cocos2d-x.org/download and Download Cocos2d-x zip file.


cocosinstall


Note: Before Cocos2d-x V 3.9  its have two different package named (Cocos2d-x and Cocos2d-js). with V3.9  they released  one package for all language which including C++,Lua and Javascript.


After downloading cocos2d-x zip file. Please unzip it.then come  cocos2d-x-3.9 directory, run ./setup.py in the console.

Screen Shot 2015-12-12 at 12.14.17

You will need Android NDK ,SDK and ANT and their  path must be provided in your computer. or you can set here. and you will need Python 2.7.5  Because this tool written Python 2.7.5 (32 bit). Python 3 not supported.


Screen Shot 2015-12-12 at 12.28.54


Note: please execute source ~/.bash_profile to make the environment setting take effect immediately.

After running setup you will see like this. if your Android NDK,SDK and ANT path is wrong or not provided you will get error.

if you get any error. Its means your setup is successful. Welcome to Cocos2d-x world :)

Now you can create Cocos2d-js project  following this link

What Is Cocos2d-js ?

| Comments

About Cocos2d-x

Started in 2010, Cocos2d-x is an open source, cross-platform game engine. It is loaded with powerful features that allow developers to create spectacular games with ease.Using the most recent version of Cocos2D-x you can target Windows, Mac, Linux, iOS and Android.Cocos2d-x framework using C++ language for development.


What is Cocos2d-js ?
Cocos2d-js is game engine port of Cocos2d-x.its targeted web and native games. It's mean its fully cross platform . you can develop HTML5 2d games and native games.Cocos2d-js  using for language  Javascript. Because of this .It can be run browser and native platforms. Even so Cocos2d-js dont losing any power of C++. Because cocos2d-js sources compile to C++ then works like Cocos2d-x games.


Main Features ( I take from Cocos2d-x websites)

  • Support All modern browsers and native platforms
  • Scene management (workflow)
  • Transitions between scenes
  • Sprites and Sprite Sheets
  • Effects: Lens, Ripple, Waves, Liquid, etc.
  • Actions (behaviours):
    • Trasformation Actions: Move, Rotate, Scale, Fade, Tint, etc.
    • Composable actions: Sequence, Spawn, Repeat, Reverse
    • Ease Actions: Exp, Sin, Cubic, Elastic, etc.
    • Misc actions: CallFunc, OrbitCamera, Follow, Tween
  • Assets manager (hot update)
  • Basic menus and buttons
  • Integrated with physics engines: Chipmunk and Box2d
  • Particle system
  • Skeleton Animations: Spine and Armature support
  • Fonts:
    • Fast font rendering using Fixed and Variable width fonts
    • Support for .ttf fonts
  • Tile Map support: Orthogonal, Isometric and Hexagonal
  • Parallax scrolling
  • Motion Streak
  • Render To Texture
  • Touch/Accelerometer on mobile devices
  • Touch/Mouse/Keyboard on desktop
  • Sound Engine support (CocosDenshion library) based on OpenAL or WebAudio on web
  • Integrated Slow motion/Fast forward
  • Fast and compressed textures: PVR compressed and uncompressed textures, ETC1 compressed textures, and more
  • Resolution Independence
  • Modularized engine for customization
  • Open Source Commercial Friendly: Compatible with open and closed source projects
  • OpenGL ES 2.0 (mobile) / OpenGL 2.1 (desktop) based
  • Full WebGL support and auto canvas fallback


After this post.  I will continue blogging   about Cocos2d-js . You can add my blog to your bookmarks. :)


Focusing an Input Field Ionic and Angular Application.

| Comments

if you developing Angular/Ionic application. Maybe you need to focusing input field. with this small code snippet is very easy.

factory('focus', function($timeout, $window) {
        return function(id) {
            $timeout(function() {
                var element = $window.document.getElementById(id);
                if(element)
                    element.focus();
            });
        };
    });


Full example on Codepen


Appcelerator Titanium Mobile Türkçe Kitap

| Comments

Türkçe kaynak sıkıntısından  yaklaşık 1 sene önce yazmaya başladığım Appcelerator Titanium ile Çapraz platform mobil uygulama geliştirme kitabını açık kaynak hale getirme kararı aldım. Bu kararın nedeni hem Titanium platformunda olan bir takım değişiklikler hemde gerekli düzeltmeleri yapacak zamanımın kısıtlı olması etkili oldu. Titanium'dan kısaca bahsetmek gerekirse javascript ile hem Android hem iOS, Windows phone Uygulamaları  (her ne kadar kitapta anlatılmasada) geliştirebilirsiniz.Kitabın Yazım süresi çok kısa oldugundan yazım yanlışları ve anlatım bozuklukları olabilir. Şimdiden affola.Umarım mobil geliştiren ve geliştirmek isteyenler için faydalı bir kaynak olur.

https://dl.orangedox.com/GxaueHo37SlPRj6PO6/TitaniumMobile.pdf